|
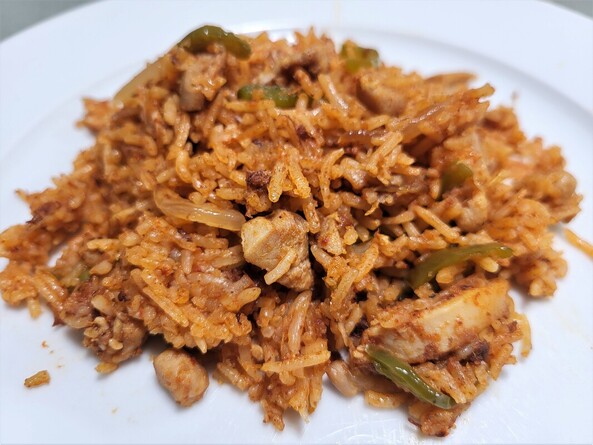
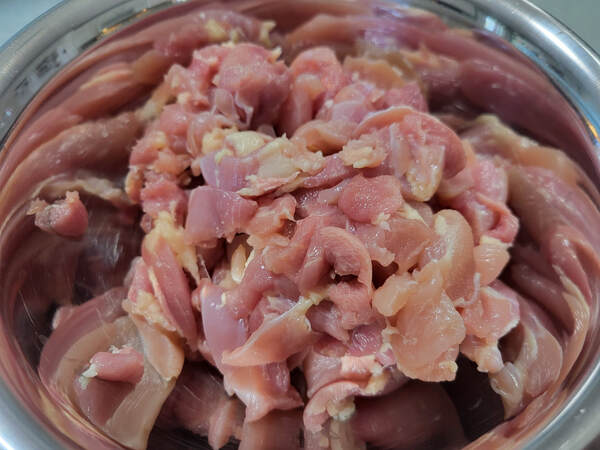
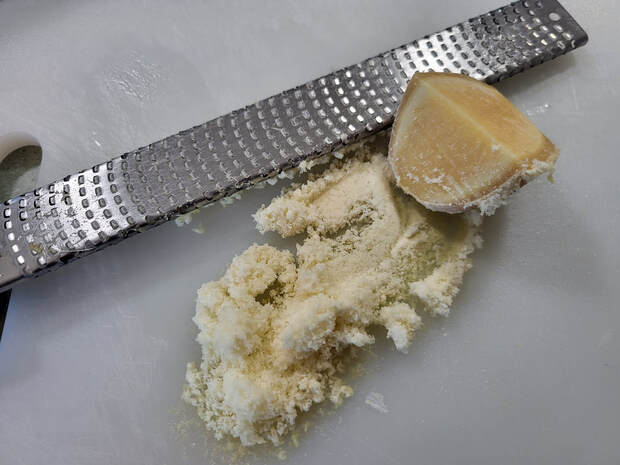
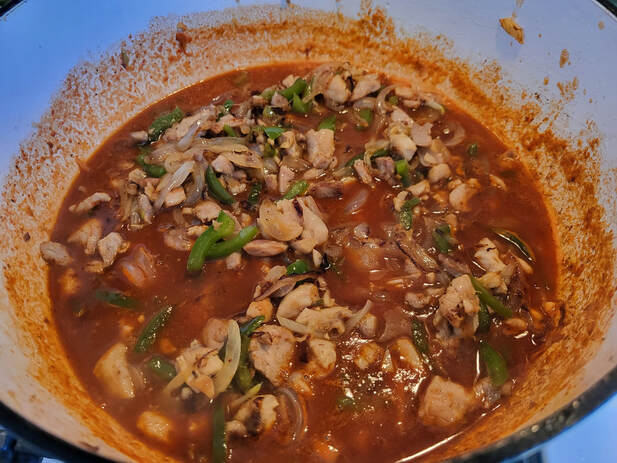
One of the great things about being a military family is that you get to live all over. Though we were never stationed abroad, we lived in seven different places during the fifteen years between when I met my husband and when he retired. One of our favorites was the Washington DC area because of the plethora of choices in international cuisine. When we move to middle Georgia, we were a bit saddened because the level of choice declined precipitously, so imagine our surprise when we came across The Metropolis Grill. This little place covers a huge portion of the world in its cuisine, ranging from Greek to Indian, but they do it all well. It was there that I finally had a tzatziki that I like (it is usually too tart for me - now I use sour cream instead of yogurt to make it and it is AMAZING!). It was also there that I was introduced to biryani. There are many, many varieties of biryani out there. This one is pretty basic, but oh so delicious... and quite easy to make! It can easily fit into a weeknight rotation. There is a bit of chopping and a little bit of grating involved and then you walk away for 20 minutes. Then, poof! Dinner is ready. First, you need to prep the veggies. This is a dish that is a bit of a blank canvas. Feel free to add additional veggies and spice as suits your family. Some of us here have a bit of a sensitivity to hot spicy, so this is pretty mild as it is written. You definitely want to use chicken thighs in this recipe. Since the chicken cooks while browning first and then also cooks with the rice, you don't want to use chicken breast because it would dry out so badly. The fattiness of the thighs is perfect for this dish. Slice them into fairly small bits so they distribute evenly in the rice when done. I suggest 1-2 pounds of chicken in this dish; use your judgement depending on how "meaty" you want the final product to be. After you soften and brown the vegetable and meat, you mix together the flavor base, which includes a fair amount of ground ginger. I keep pieces of peeled ginger in the freezer so that it is always ready to go when I need it. When I tried to keep it on hand fresh all the time, it was always going bad. This way, I never waste any and grating it with a Microplane results in the perfect ginger paste. Measuring the amount can be a bit tedious, so I always just kind of eyeball it. It doesn't have to be exact! Once you have the sauce mixed, bring it to a boil and dump in the basmati rice and then spread the veggies and meat on top. Put the lid on, turn it on low, and walk away for 20 minutes. You will be amazed at the fluffy, delicious dish that awaits you when you return. It is also excellent as leftovers, so feel free to double the recipe if you wish. I forgot to the time I made this for the photos, but I also like to add chopped fresh or frozen parsley at the last minute before serving. Biryani
Yield: 4 large servings 1 large onion, cut in small slices 1/2 - 1 green bell pepper, cut in small slices 1 large clove garlic, minced or grated 2 TBS ghee (clarified butter) 1-2 lb boneless, skinless chicken thighs, sliced small 2 1/2 cup water 3 TBS tomato paste 1 TBS fresh ginger, grated into a paste 1 TBS smoked paprika 1 tsp garam masala 1/2 ground cumin 1/2 tsp salt, plus to taste 1 1/2 cup basmati rice, rinsed Heat a large Dutch oven with the ghee and sauté the vegetables until soft and browned. A bit of browning is important for the overall flavor development of the final dish, so don't be shy here. Remove the veggies into a bowl temporarily while you then brown the meat. Again, try to develop some good color. The nice thing about thighs is that you can forego the "small batches" method of sauteing and let them steam cook initially; eventually, the liquid will all evaporate and then you can easily get some nice color on them without worrying about the meat drying out or getting really tough. Remove the cooked meat to the bowl as well briefly. Add the water to the hot pan and use it to loosen up any browned bits on the bottom of the pan, if necessary. Add the tomato and seasonings and let the mixture come to a boil. Add the rice, stir once, put the mixed veggies and meat on top, and put on the cover. Reduce the heat to low and simmer for twenty minutes. After twenty minutes, remove from the heat and let sit for just a few minutes before opening the Dutch oven and fluffy it all together. Serve and enjoy!
0 Comments
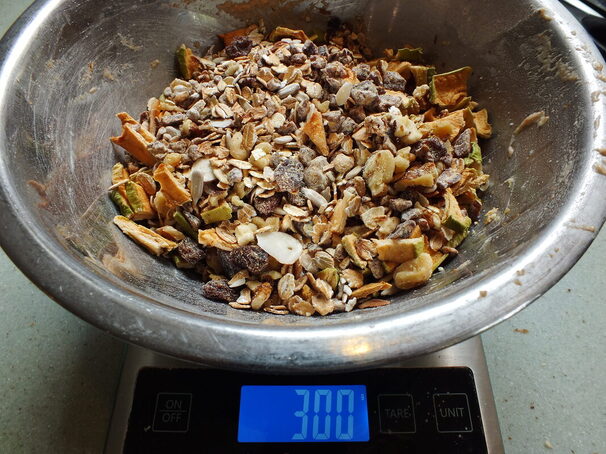
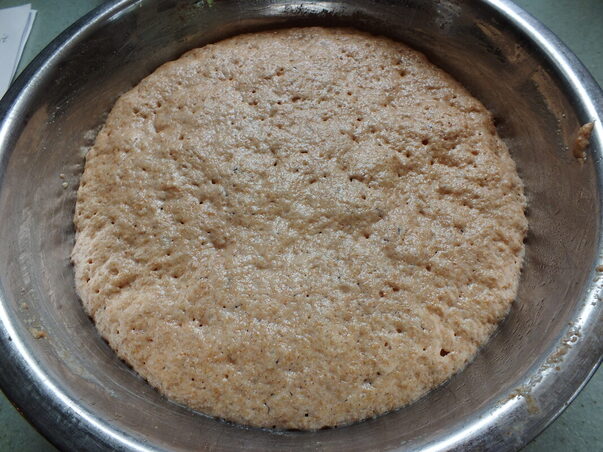
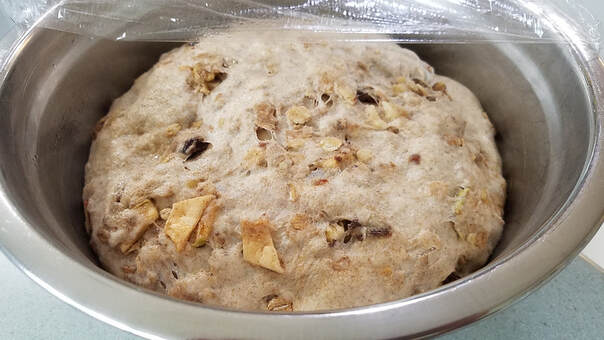
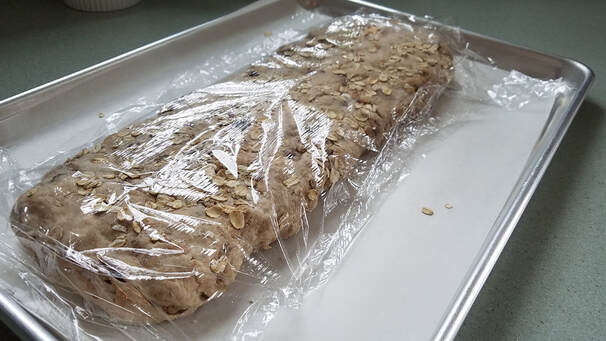
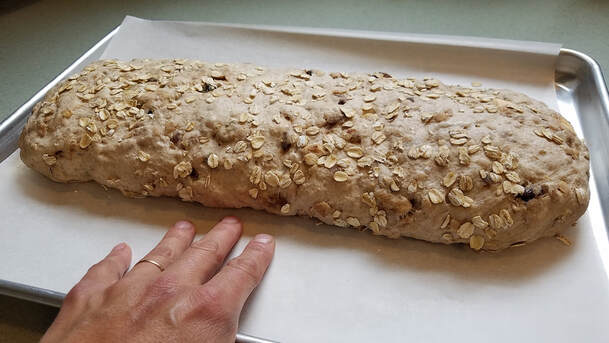
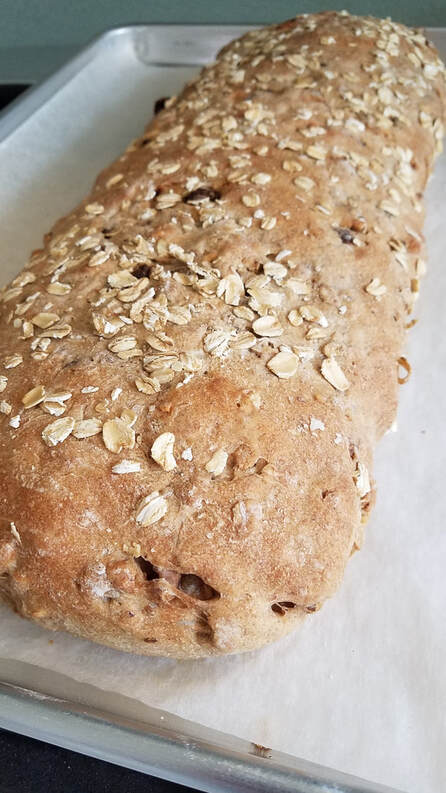
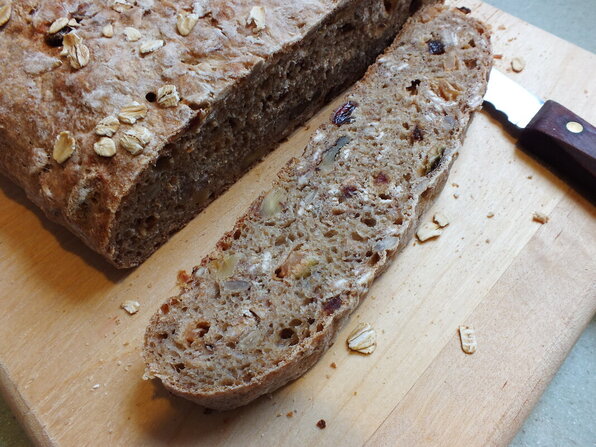
I love baking homemade bread. Waiting for it to cool enough to cut when it is fresh from the oven is the hardest part, and yet, with many of my favorite recipes, toasting them on subsequent days is my number one way to enjoy them. This one especially fits under that category. This bread is full of heavy, hearty add-ins, and that means that it ends up being a fair dense loaf. When toasted, that denseness is completely irrelevant and with a little butter - maybe some jam - this bread is a meal unto itself. You can mix your own add-ins, but I use Bob's Red Mill Muesli as my main player along with some dehydrated apples that I cut up with scissors. I especially love the dried fruit. It gives a great little flavor burst in the finished bread. Bread making is about the only time I use weight measurements. It just makes it so easy to measure out the ingredients. This bread is mixed in two stages. It has a pre-ferment, but it is a fairly short-lived one, only about two hours. The preferment has a fair amount of food for the yeast in it, so it gets big fast. To the preferment, you add the water, flours, and salt and then mix either by hand or with a stand mixer. Do NOT add the add-ins until the bread is well kneaded because they will break the developing gluten strands and make it hard to develop the dough. Once the dough is stretchy and smooth, about ten minutes of mixing, you can very gently mix in the add-ins. You do not want to overmix the dough at this point, just mix enough to get them somewhat evenly distributed. Cover and let rise in a warm place until double, normally a few hours. This dough is fairly easy to shape. Dump it out on the counter and shape into a stubby rectangle, then pick up the ends and alternatively flip the ends to stretch the dough. You want the motion of a suspension bridge while gently pulling apart the dough. This will cause it to thin and elongate. Shape into a roughly 12 x 4 inch loaf. It will be about 3/4 of an inch thick. Cover with plastic wrap and let rise until almost double. When the dough is getting close to being ready, pre-heat the oven. The dough will be puffy and it is ready when you gently poke the dough with your finger and it is slow to rebound. To help with crust development, I also have a spray bottle with water in it and give a few spritzes on the sides of the oven when I put the loaf in. Bake for 25 to 30 minutes, until the bread has a nice golden color on it. On this loaf, color is normally enough of an indicator to tell when it is done, but other signs include a hollow sound when tapped and an internal temperature of 210F. Again, the hardest part is to let it cool for a bit before slicing into it. That cool down time is actually a very important step in the baking of a loaf, so try to curb your enthusiasm! Look at all that good stuff in there. Talk about a bread that tastes good and keeps you going. Muesli Bread
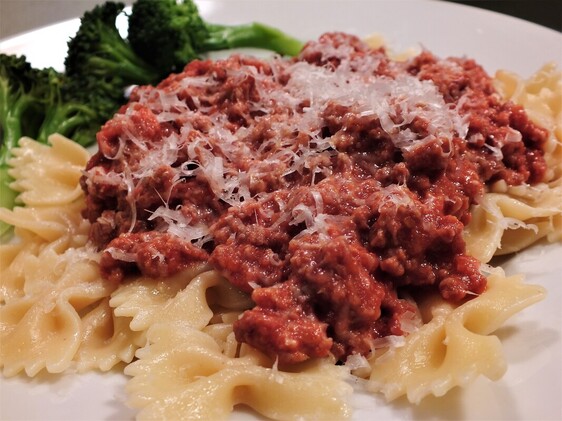
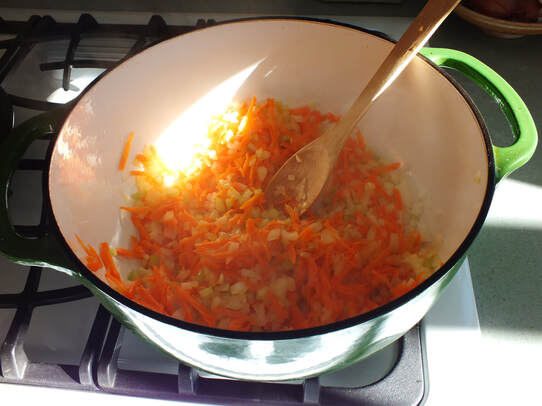
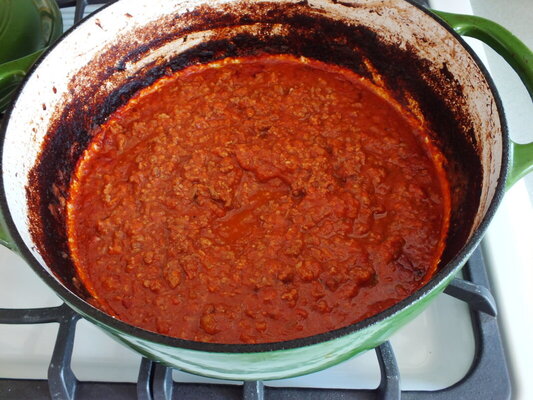
Yield: 1 loaf Preferment: 200 g whole wheat flour 200 g lukewarm water 30 g honey 5 g instant yeast 200 g water 250 g bread flour 50 g rye flour (light or dark) 10 g salt 300 g mix ins (such as muesli mix, rolled grains, nuts, seeds, and dried fruit) Mix the preferment and let sit 2 hours until puffed and bubbly. Mix the preferment and all other ingredients except the add-ins and knead until stretchy and smooth, about 10 minutes. Once the dough is nicely developed, gently knead the add-ins into the dough. Do not overmix at this point because the add-ins can break down the gluten structure you worked so hard to develop. Let the dough rise in a covered bowl until double. Shape the dough into a roughly 12x4 inch loaf. It should be about 3/4" tall. Place on a parchment covered or greased sheet pan and cover with plastic wrap or a damp towel to rise until almost doubled. It will be nice and puffy when ready. Shortly before it is ready, preheat the oven to 450F. When the loaf and the oven are ready, place the uncovered loaf in the middle of the oven, spritz the sides of the oven a few times with water from a spray bottle and then reduce the oven temperature to 400F. Bake for 25-30 minutes, until the loaf is nicely golden. Let cool almost completely before enjoying. This bread makes excellent toast, and I like to slice the bread and then freeze the slices so I can easily grab a slice and toast it on busy mornings for breakfast. I'd always been under the impression that Bolognese was a commitment to make, that it was hard and time consuming. Turns out, it really just takes time to cook, but the actual work involved is relatively minor. A little upfront work with a knife and the rest is cake. Bolognese is one of those dishes that I think tends to have a bit of confusion around it. Just what is it, anyway? I've heard it used as a synonym for the classic American red spaghetti sauce, but that's not what it refers to in Italy. This is a fairly classic (and easy) version of the Italian Bolognese sauce, which involves a soffritto, meat, milk, wine, and tomatoes. A soffritto (not to be confused with the Spanish sofrito) is simply a flavor base of minced onion, celery, and carrot, cooked in olive oil. I add a little garlic here, too, because, well... garlic. Yum. In this case, I actually like to grate the carrots so that they completely break down into the dish. I like the final texture better and the carrots simply become a part of the flavor base. After the soffritto is softened and golden, add the meats and brown. Once it is cooked through, you can deglaze the pan with the wine (be sure to use a decent wine). Add the broth and salt. Bake in a 350F oven with the lid ajar for about one hour. The liquid will be almost all gone and the pan will have a bunch of good stuff cooked up onto the sides. That's some good flavor there!! Remove from the oven and add the milk (be sure to use whole milk for the best results), tomatoes, and nutmeg. Stir together and then put back in the oven for another hour with no lid, stirring periodically. When it is almost as thick as you would like it, reduce oven to 300F and add the bay, a dash of ground white pepper, and salt to taste. Continue baking until it is the thickness you prefer. I like mine pretty thick because it concentrates the flavors so much. If it gets too thick, you can always add a bit of the pasta water to loosed it back up. Serve over pasta with fresh Parmigianino Reggiano. Classic Bolognese Serves: 4 2 TBS olive oil 1 medium onion, minced (1 1/2 to 2 cups) 1 medium carrot, shredded (about 1 cup) 2 stalks celery, minced (about 1/2 cup) 1 large garlic clove 1/2 tsp salt 1 pound ground pork 1 pound ground beef 3/4 cup Chardonnay 1 cup beef broth 1 1/2 cup whole milk 1 (26oz) box Pomi strained tomatoes (see note below) 1/8 tsp ground bay dash nutmeg and white pepper salt to taste Sauté the vegetables in the oil in a heavy Dutch oven. Preheat the oven to 350F. When vegetables are softened and slightly golden, add the meat and brown through. Deglaze the pan with the wine, add the broth, and bake with the lid ajar for one hour. The liquid should be almost all gone. Remove from the oven, remove the lid, and add the milk and tomatoes. Stir until well mixed, scraping down the browned bits from the sides. Continue baking, uncovered, for another hour or so. Reduce the heat to 300F, add the remaining seasonings, and then return to the oven for 20 minutes or until the sauce is thick enough for your taste. Serve over freshly cooked pasta. If the sauce ends up too thick, you can stir in some of the pasta water to loosen it back up. NOTE: You can use any tomato puree you'd like, but I have become convinced that Pomi tomatoes are the best out there. They are always sweet, they don't have the acrid tang that sometimes plagues tomatoes in a can, and I never regret adding them to a dish. You can find them in most supermarkets. Look for the red and white cartons. |
Archives
November 2023
Categories
All
|


 RSS Feed