|
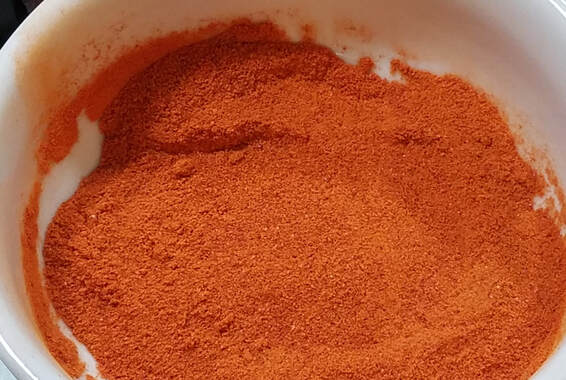
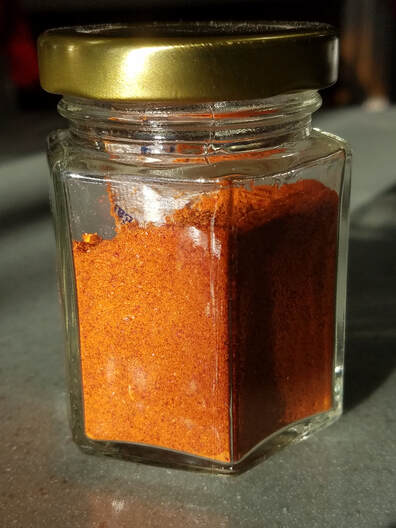
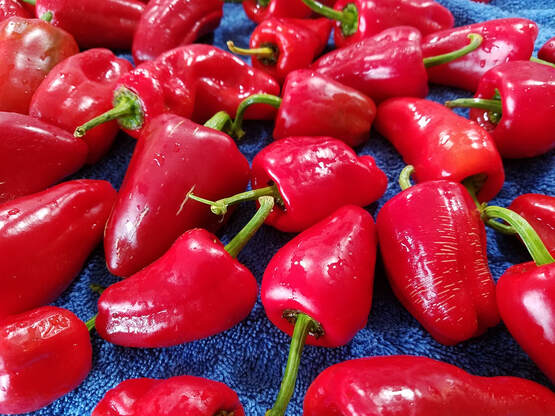
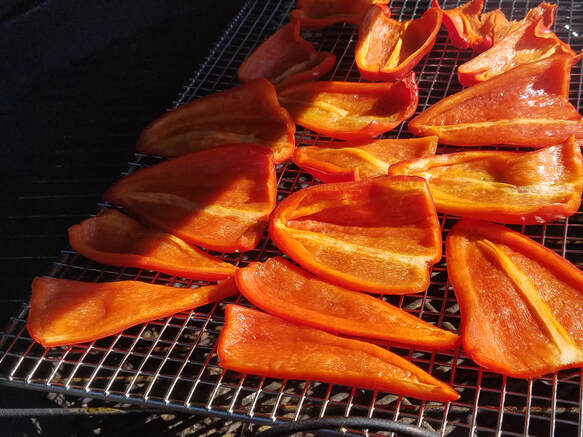
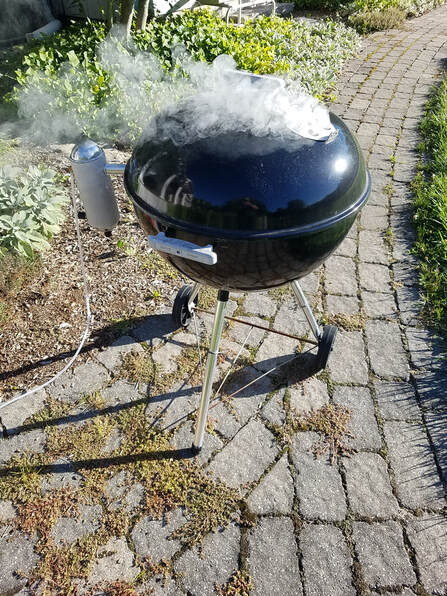
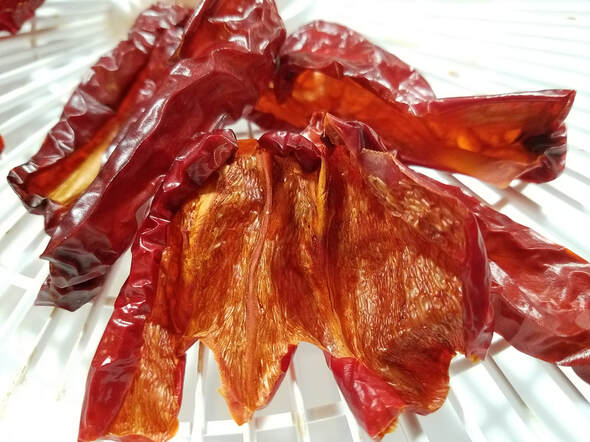
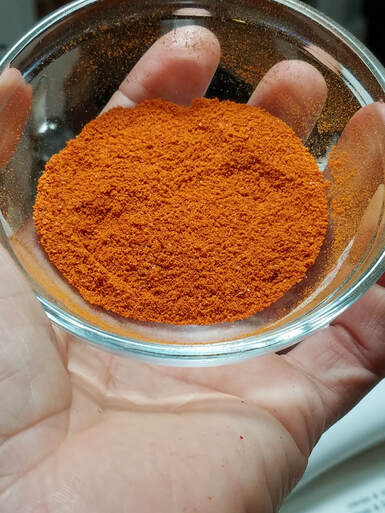
If you are a gardener like me, you spent most of your winter drooling over seed catalogs, ordering seeds, and trying to figure out where the heck you'll put those things you ordered that you had to have but don't currently have a place for! If you have a vegetable garden and have never made your own paprika, this will be a slam dunk idea for you. Even if you don't really garden, this is one of those things that may just change your mind. There are certain things that are just orders of magnitude better when you produce them yourself. Tomatoes, of course, are at the top of that list. Dried herbs like oregano and thyme are on the list, too. I only learned a few years ago that paprika was right up there. Though there are many ways to finagle this, honestly, I highly recommend three "special" pieces of equipment for this operation. The first is a cold smoke generator. I bought and like the Smoke Daddy smoker. I cut a hole in my Weber grill and it is an amazing way to smoke all kinds of things. It was a little bit of an investment (about $150), but it will last me for a good long time, and now I'm expanding into smoking other foods, too. The second is a countertop dehydrator. I have the Nesco and really recommend getting one with a temperature control setting. The last one is a Nutribullet or similar type blender. You can use a regular blender, but the powder is very fine and can be irritating to breathe. The Nutribullet is completely enclosed. I like that I can pick up and shake it while pulverizing the powder to be sure it isn't clumping on the bottom. All right, so let's talk about pepper varieties. The best bet is a pepper specifically bred for making paprika. Baker Creek carries a variety that makes a phenomenal paprika! It has a bit of spice, so I usually blend it with a sweeter pepper to be sure it's not too hot. While you can use pretty much any red, sweet pepper, I recommend you try to stick with thin-walled peppers that are good for drying. The thicker walled peppers make a powder that tends to clump. This isn't a huge deal since it breaks apart fairly easily if stored properly, but if you can find some good thin-walled peppers like Criolla de Cocina, you'll have really good results. Harvest the peppers when fully ripe. Only use peppers that are in good condition, without any holes of soft spots. Since the powder will not always be cooked before consumption, the best way to minimize any chance of foodborne illness is to sanitize the peppers before beginning. Rinse the peppers and then dunk in a bleach solution for one minute. You want to be sure to use plain bleach that says it is okay to use for food surfaces (without fragrance, etc.). If it is standard strength bleach, use 4 teaspoons per gallon of water. Also, be sure the water is warmer than the peppers themselves to minimize any potential for any of the wash water being sucked into the pores of the fruit. Rinse the fruit one more time with clean water and you are good to proceed. Cut the peppers and remove the stems, seeds, and white pith. Place the peppers on racks. This photo shows them cut side up. I have since started turning them cut side down because I noticed the peppers often accumulate moisture in them that way, and we want to minimize that. Cold smoke the peppers heavily for three hours (by cold smoke, I mean no heat added, not that the peppers are "cold" or anything). I experimented with a few different kinds of wood for the smoke and found cherry was, by far, the best. The next stop is to dry them thoroughly in a dehydrator. If your dehydrator has a temperature control, set it to 145F. While drying, the peppers will release A LOT of smokey aroma. I dry mine outside under a covered porch. It usually takes 12-16 hours to dry them completely in an average humidity location. You want them to be absolutely, completely dry, crisp and crunchy all the way through. There is no such thing as over-drying them, so if you are unsure whether they are done enough, wait a bit longer. The last step is to run them through a blender of some kind. Again, I highly recommend a Nutribullet type contraption. Then, sift the powder through a fine sieve to remove any larger pieces that didn't break down. I store my powder in jars with plastisol type seals (jelly jars or the like) with a food grade moisture absorber (available on amazon for a very reasonable price). If completely powdery and dry when complete, it keeps very well for over a year. My mom had been in Europe and bought some Hungarian smoked paprika about the time I started experimenting with this. After she tried mine, she made it clear that she thinks mine is way better! How's that for a recommendation!?! I have found so, so many uses for this stuff. Now that I make my own, I find I use smoked paprika way more often than I used to. It's just so darn good! I wish the state would let me make it to sell, but they won't without a commercial kitchen, so I figured I'd just have to tell you how to make your own! Trust me, it's so worth it!
0 Comments
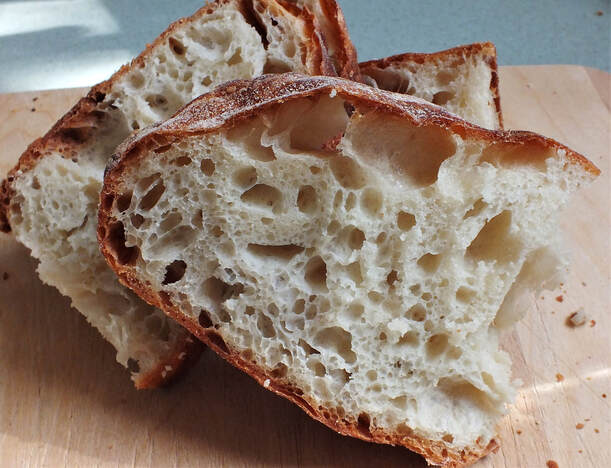
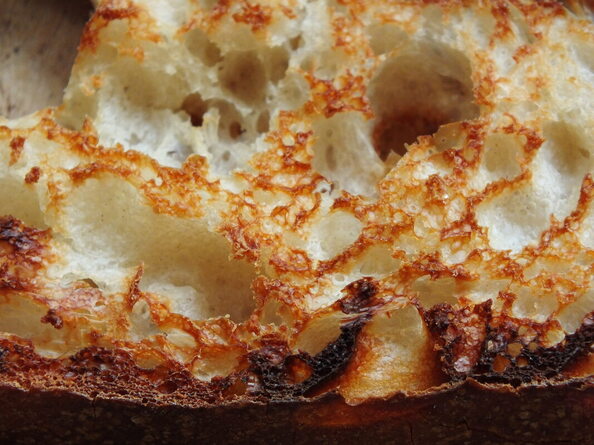
It took me a long time to figure out how to make bread with big holes. The key is to have a very wet/hydrated dough. That part is easy. Mix more water in? Ok. No problem. But then what!?! How do you knead such a thing and how do you shape it? The good news is that this bread does not require any kneading and the shaping is actually quite easy, provided you know the secret. I make all kinds of breads, some easy and some very involved (can you say croissant?). This may be one of the easier breads in my arsenal. I love the simplicity of it... just four ingredients. And since it ferments overnight on your counter, it has a nicely complex flavor. Really, it's just a win-win. The night before you want to bake the bread, mix the flour and water in a bowl or tub of some kind. It should be at least two quarts in volume. Let the flour and water sit for 15-20 minutes and then add the salt and yeast. Use damp hands or a mixer to thoroughly mix in the salt and yeast. If using your hands, a pinching motion is very effective. Cover the dough and let sit on the counter overnight. The next day, when ready to finish your bread, flour your board/counter and using a wet hand, dump the dough onto the counter. Pull and fold the dough until it tightens up and starts to form a nice ball and then pinch the seams together. Let the dough proof on the counter with a towel or wrap over it. It's okay if the outside of the bread dries out a little bit. When the dough looks like it is just about ready, preheat your oven to 450F with a Dutch oven in it. You could also bake this bread on a pizza stone and spritz water in a few times during the first few minutes of baking, but the Dutch oven seems easiest. So how do you know when the dough is done rising after shaping? Give the dough a little poke and see how quicky it springs backs, if at all. Depress the dough about half an inch. The video below shows dough that still has a bit to go. Notice how quickly the hole rebounds. If I had let the video go a bit longer, you'd see that within a minute the hole is almost completely rebounded. There's a fine line between a loaf that is ready and one that is too far gone, so err on the side of caution. When the hole is slow to rebound, you should go ahead and start preheating the oven. Gently dump the loaf into the Dutch oven, seam side up. This will allow the loaf to usually break open on top, like you would get with a cut score line, but you don't have to score it. You may be worried about the loaf getting misshapen, but I have found, the loaves are usually pretty forgiving. Just be careful not to burn yourself on the hot pot! Let the loaf bake with the lid on for 25 minutes and then remove the lid and carefully remove the loaf from the pot and finish baking on the rack. Be sure to let it bake fully, getting nicely darkened, to ensure the crumb is not gummy when it cools. Speaking of cooling, be sure to let it do so completely (or almost completely) before cutting. I know it is soooooo hard to leave it be to cool, but it is an important part of the baking process! Easy Holey Boule Yield: 1 medium sized boule 500 grams white bread flour 390 grams warmish water 7 grams salt 1/4 tsp instant yeast The night before you want to have the bread, mix the flour and water and let it sit for about 20 minutes. Then add in the salt and yeast. Cover and let sit on the counter overnight. The next day, the dough should have doubled or tripled in size. Sprinkle some flour on the board/counter and wet your hand. Shape the dough into a boule using folds (see video in this post for how to do that). Place in a well floured proofing basket seam side down. Cover and let proof fully (see comment with video above for details). When dough is almost fully proofed, preheat the oven and Dutch oven to 450F. Gently dump the loaf into the Dutch oven, seam side up. Bake, covered, for 20 minutes. Carefully remove the loaf from the Dutch oven and finish baking on the rack. Let the loaf bake until very golden brown. Let cool fully before slicing. I think the easiest way to cut a boule is to cut the loaf in half, place a half cut-side down, and then cut into slices. By the way, we call toast made from this kind of bread "crunchy toast" in our house to differentiate it from regular loaf bread toast. It truly is a spectacular way to enjoy it. The crispness of it is out of this world! So delicious!
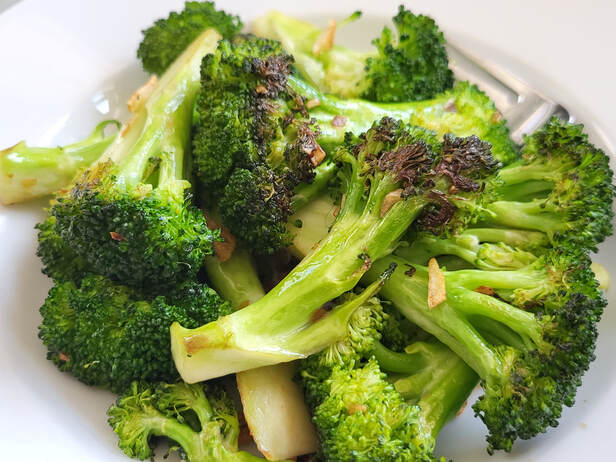
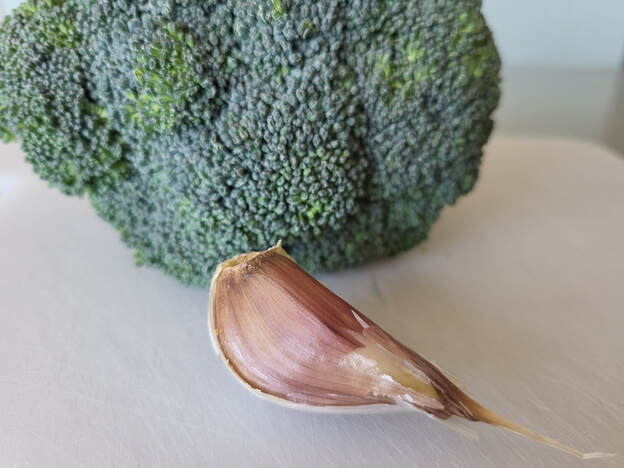
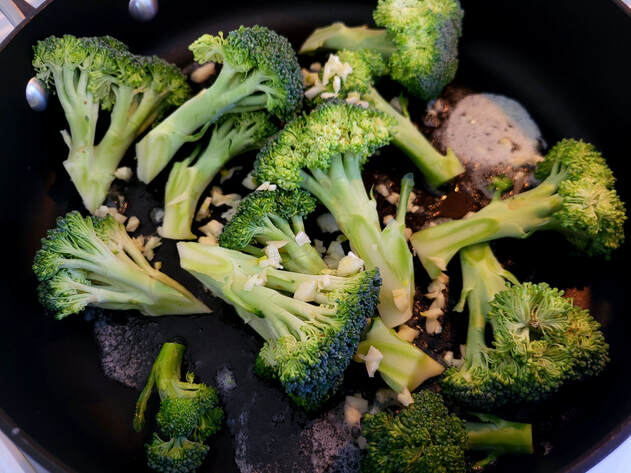
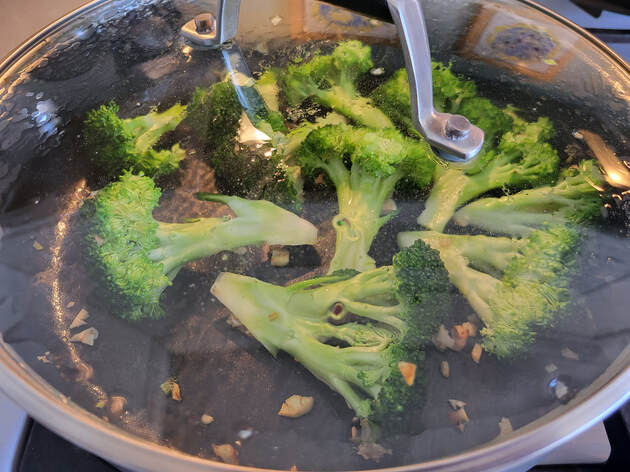
I love this recipe, but I have to begin with a bit of a caveat. I may love broccoli more than any person on the planet. Whatever that gene is that makes you not like broccoli? I sure don't have it. I adore this vegetable. Not only does it taste great to me - even just simply steamed - but it is so good for you! Some people grab a yogurt when they feel like their gut is feeling wonky; my go to is broccoli. I aways feel so good after I've eaten it. Last year, I planted "aspabroc" or "broccolini" in my garden. What an amazing and surprising harvest that was! I planted eight of them in early May and started harvesting, I think, in late June. I harvested regularly all the way through early October. You don't ever get that with regular heading broccoli! And it tasted amazing. I have my seedlings started for this year, but in the meantime, I have to settle for the store-bought stuff. One other gardening mention here... two years ago, I planted garlic for the first time. I bought two varieties. One was a really common variety that everyone talked about liking. It is called Music and it is a fine variety. The other variety, I bought only a small amount of because there weren't a lot of folks talking about it online, but I liked the description of it. I. Love. That. Garlic. This past fall, this special variety was all I planted. It is called Georgian Crystal. I tried it because the description said it was mild when raw (I want to enjoy lots of garlic flavor when raw, not a hot spiciness that some varieties have) and is also great when roasted. That description fits this garlic to a T... and it makes big cloves to boot! It is amazing - the perfect multi-purpose garlic. I was surprised at how easy garlic is to grow. I highly recommend growing your own if you are garden inclined. This is a super easy way to enjoy broccoli. The garlic adds a nice, toasty umami flavor to it. You can chop the pieces any size that you like - obviously, the smaller the pieces, the faster it will cook. Pre-heat a non-stick pan with a pat of butter. Then toss in the broccoli and the garlic. Put a lid on and put the heat on medium. Shake the pan from time to time to stir the broccoli. If you notice it browning too much too fast, simply turn the heat down. Use a fork periodically to check how tender the broccoli is. When it is close to being done, you can turn the heat up to get some nice browning as it finishes up. Don't forget to salt before serving. This is a great side dish for a quick weeknight meal as it takes very little effort to prepare. The broccoli cooks in less than ten minutes.
Blistered Broccoli with Garlic Yield: variable broccoli or broccolini, split into manageable spears 1 large clove of garlic, minced, per half pound of broccoli 2 tsp butter salt to taste Pre-heat a non-stick pan while you prepare the broccoli and garlic. Add the butter and swirl it around as it melts. Add the broccoli and garlic and cover with a lid. Cook over medium heat, shaking the pan or stirring occasionally to brown evenly. Reduce heat if broccoli is browning too quickly. The broccoli takes less than ten minutes to cook if you like it with a bit of a bite to it. When broccoli is nearly as tender as you would like, you can remove the lid and turn the heat up to put a last bit of browning on it. Salt to taste and serve. |
Archives
November 2023
Categories
All
|
 RSS Feed