|
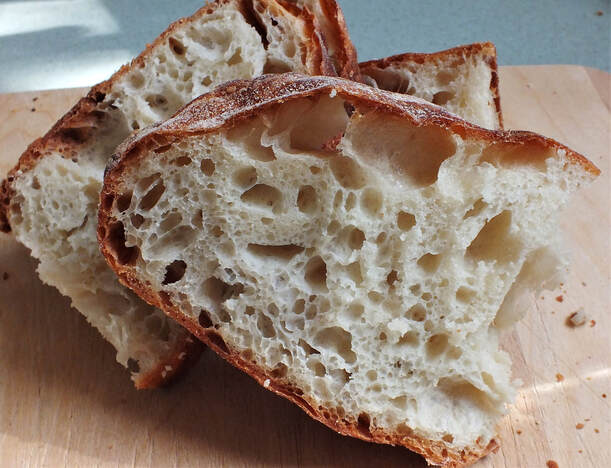
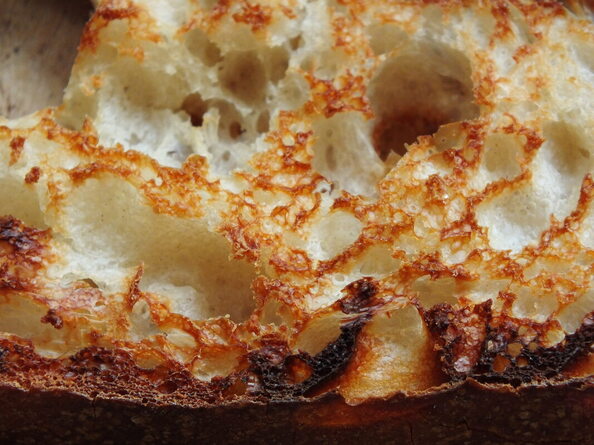
It took me a long time to figure out how to make bread with big holes. The key is to have a very wet/hydrated dough. That part is easy. Mix more water in? Ok. No problem. But then what!?! How do you knead such a thing and how do you shape it? The good news is that this bread does not require any kneading and the shaping is actually quite easy, provided you know the secret. I make all kinds of breads, some easy and some very involved (can you say croissant?). This may be one of the easier breads in my arsenal. I love the simplicity of it... just four ingredients. And since it ferments overnight on your counter, it has a nicely complex flavor. Really, it's just a win-win. The night before you want to bake the bread, mix the flour and water in a bowl or tub of some kind. It should be at least two quarts in volume. Let the flour and water sit for 15-20 minutes and then add the salt and yeast. Use damp hands or a mixer to thoroughly mix in the salt and yeast. If using your hands, a pinching motion is very effective. Cover the dough and let sit on the counter overnight. The next day, when ready to finish your bread, flour your board/counter and using a wet hand, dump the dough onto the counter. Pull and fold the dough until it tightens up and starts to form a nice ball and then pinch the seams together. Let the dough proof on the counter with a towel or wrap over it. It's okay if the outside of the bread dries out a little bit. When the dough looks like it is just about ready, preheat your oven to 450F with a Dutch oven in it. You could also bake this bread on a pizza stone and spritz water in a few times during the first few minutes of baking, but the Dutch oven seems easiest. So how do you know when the dough is done rising after shaping? Give the dough a little poke and see how quicky it springs backs, if at all. Depress the dough about half an inch. The video below shows dough that still has a bit to go. Notice how quickly the hole rebounds. If I had let the video go a bit longer, you'd see that within a minute the hole is almost completely rebounded. There's a fine line between a loaf that is ready and one that is too far gone, so err on the side of caution. When the hole is slow to rebound, you should go ahead and start preheating the oven. Gently dump the loaf into the Dutch oven, seam side up. This will allow the loaf to usually break open on top, like you would get with a cut score line, but you don't have to score it. You may be worried about the loaf getting misshapen, but I have found, the loaves are usually pretty forgiving. Just be careful not to burn yourself on the hot pot! Let the loaf bake with the lid on for 25 minutes and then remove the lid and carefully remove the loaf from the pot and finish baking on the rack. Be sure to let it bake fully, getting nicely darkened, to ensure the crumb is not gummy when it cools. Speaking of cooling, be sure to let it do so completely (or almost completely) before cutting. I know it is soooooo hard to leave it be to cool, but it is an important part of the baking process! Easy Holey Boule Yield: 1 medium sized boule 500 grams white bread flour 390 grams warmish water 7 grams salt 1/4 tsp instant yeast The night before you want to have the bread, mix the flour and water and let it sit for about 20 minutes. Then add in the salt and yeast. Cover and let sit on the counter overnight. The next day, the dough should have doubled or tripled in size. Sprinkle some flour on the board/counter and wet your hand. Shape the dough into a boule using folds (see video in this post for how to do that). Place in a well floured proofing basket seam side down. Cover and let proof fully (see comment with video above for details). When dough is almost fully proofed, preheat the oven and Dutch oven to 450F. Gently dump the loaf into the Dutch oven, seam side up. Bake, covered, for 20 minutes. Carefully remove the loaf from the Dutch oven and finish baking on the rack. Let the loaf bake until very golden brown. Let cool fully before slicing. I think the easiest way to cut a boule is to cut the loaf in half, place a half cut-side down, and then cut into slices. By the way, we call toast made from this kind of bread "crunchy toast" in our house to differentiate it from regular loaf bread toast. It truly is a spectacular way to enjoy it. The crispness of it is out of this world! So delicious!
1 Comment
Sue Makowiecki
4/27/2023 02:37:59 pm
Yummy, I can't wait to test it out
Reply
Leave a Reply. |
Archives
November 2023
Categories
All
|


 RSS Feed